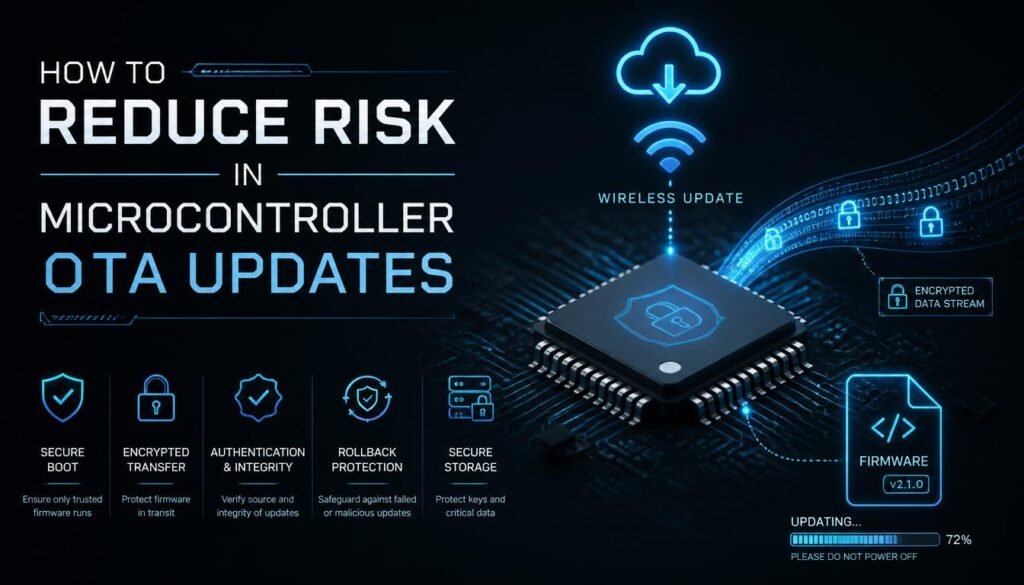
I have been working with embedded systems and microcontroller firmware updates long enough to know that the process is never as simple as “push and pray.” In this blog, I am going to walk you through everything I have personally learned about reducing risk in microcontroller OTA updates, from signing your firmware to staging your rollouts like a professional. This is the guide I wish someone had handed me on day one.
What Are Microcontroller OTA Updates and Why Are They So Risky?
Before we get into the risk-reduction strategies, let us make sure we are on the same page about what we are actually dealing with.
A microcontroller OTA update is the process of remotely pushing new firmware to a microcontroller unit (MCU) over a wireless network, such as Wi-Fi, Bluetooth Low Energy (BLE), LoRaWAN, or cellular. The device downloads the new firmware image, verifies it, writes it to flash memory, and reboots into the new version.
Sounds clean, right? In theory, yes. In practice, here is where things get dangerous.
Microcontrollers are not like servers or smartphones. They are small, constrained devices with limited RAM, limited flash storage, and very little room for error. They often run in environments where physical access is impossible or extremely expensive. When an update fails midway because of a dropped connection, a power cut, or a corrupted packet, the device can become completely unresponsive. That is what engineers call a “bricked” device, and in a fleet of thousands, bricking even 1% can cost a company a massive amount of money and reputation.
The risks fall into three big categories: security risks (someone hijacks your update pipeline and pushes malicious firmware), reliability risks (the update process itself fails and corrupts the device), and operational risks (the new firmware has bugs that break functionality after installation). My job today is to help you tackle all three.
Risk 1: Insecure Firmware Delivery:
Always Sign Your Firmware:
This is the number one rule of secure OTA firmware updates, and I cannot stress it enough. Every firmware image you push must be cryptographically signed. This means using a private key to sign the image before it leaves your build server, and using a public key embedded in the device’s bootloader to verify that signature before the firmware is ever installed.
The most widely used approach is ECDSA (Elliptic Curve Digital Signature Algorithm), which is lightweight enough for resource-constrained MCUs but still cryptographically strong. On ARM Cortex-M-based devices like the STM32 and nRF52840, this is well-supported and has been proven in production environments.
What does signing protect you from? It protects you from attackers who intercept your update traffic and try to substitute their own malicious firmware. Without a valid signature from your private key, the device will flat-out reject the image. No exceptions.
I have made it a personal rule to never, under any circumstances, ship a device to production without firmware signing in place. Even for internal test devices, it is a habit worth building early.
Encrypt Your Update Packages:
Firmware signing ensures integrity and authenticity. But it does not keep the contents of your firmware confidential. If you want to protect your intellectual property from reverse engineering, you also need to encrypt the firmware package.
AES-GCM (Advanced Encryption Standard in Galois/Counter Mode) is the go-to choice for embedded systems. It provides both encryption for confidentiality and authentication for integrity, all in a single pass. That is extremely valuable when you are working with microcontrollers that cannot afford the overhead of running separate encryption and authentication operations.
Combined with ECDSA for signing, this approach creates a robust layer of security where your firmware is both secret and verifiable. Research has validated this combination on ARM Cortex-M microcontrollers, showing that the overhead is minimal, roughly 14 KB of extra flash and 3 KB of RAM, which is absolutely manageable on most modern MCUs.
Use TLS for Transport Security:
It is not enough to sign and encrypt the firmware package itself. You also need to make sure that the delivery channel is secure. Always use TLS 1.3 for transporting firmware from your server to the device. Combine this with mutual authentication, where both the device and the server verify each other’s identity, to make sure your devices are only ever talking to your legitimate update infrastructure.
Certificate pinning is an extra layer worth adding, especially for consumer-facing devices. It tells the device to only trust a specific server certificate, so even if an attacker manages to compromise a certificate authority, they cannot trick your device into downloading from a fake server.
Risk 2: Firmware Rollback Attacks:
Implement Anti-Rollback Mechanisms:
Here is a sneaky attack vector that a lot of engineers overlook. An attacker who cannot push new malicious firmware might instead try to “downgrade” your device to an older firmware version that contains a known, already-patched vulnerability. This is called a firmware rollback attack, and it is more common than you think.
The defense is an anti-rollback mechanism, which works by storing a firmware version counter in secure, non-volatile memory such as eFuses or a secure element. Every time a new firmware is successfully installed, the counter increments. The bootloader then refuses to install any firmware with a version number lower than the stored counter. The device can move forward, but it cannot be forced backward.
On ESP32 devices, this is built into the SDK. On STM32 and other ARM Cortex-M platforms, you can implement it using hardware monotonic counters. Either way, it is a non-negotiable feature for any production OTA system.
I learned to take rollback protection seriously after reading about real-world cases where production IoT devices were exploited by reinstalling outdated firmware. It takes one afternoon to implement and can save you from a fleet-wide security incident.
Risk 3: Update Failures and Bricked Devices:
Use Dual-Bank (A/B) Flash Architecture:
This is arguably the most important reliability feature you can build into your OTA update system at the hardware and firmware architecture level. The idea is simple but powerful.
Instead of having one firmware slot in flash memory that gets overwritten during an update, you have two. Slot A holds the currently running firmware. When an update comes in, it gets written to Slot B. Only after the new firmware in Slot B has been fully downloaded, verified, and confirmed to boot successfully does the bootloader switch over to running from Slot B. If anything goes wrong during the update, the device stays on Slot A. Nothing is lost. Nothing is bricked.
This is called atomic updates, and it is the gold standard for embedded OTA reliability. Tools like MCUBoot, an open-source secure bootloader, support dual-bank flashing with signature verification and rollback out of the box. STM32, nRF52, and ESP32 all provide mechanisms for implementing A/B partitioning.
In my own projects, switching to dual-bank architecture eliminated bricked-device incidents almost entirely. The extra flash cost is worth every byte.
Implement Watchdog Timers and Health Checks:
Even with dual-bank architecture, the newly booted firmware might appear to install fine, but then crash repeatedly due to a software bug. You need a way to detect this automatically and revert to the previous version.
The answer is a watchdog timer combined with a firmware health check during the boot confirmation window. Here is how it works in practice. After the device boots into the new firmware, it has a set window, say 60 seconds, to perform a series of self-checks: can it connect to the network? Can it communicate with its sensors? Is the main application loop running correctly? If all checks pass, the new firmware is “confirmed” as good, and the bootloader marks it as the permanent primary.
If the checks fail or if the device crashes and the watchdog timer fires before confirmation is reached, the bootloader automatically rolls back to the previous firmware on the next reboot. The device recovers itself without any human intervention.
This self-healing behavior is not optional in production. It is the safety net that catches what your testing missed.
Handle Interrupted Updates Gracefully:
Real-world devices update over real-world connections. That means dropped packets, power outages mid-download, and devices that go offline at the worst possible moment. Your OTA system must be designed to handle all of these gracefully.
Resumable downloads are essential. If a download is interrupted at 70%, the device should be able to pick up from where it left off rather than starting over from scratch. This is especially critical for bandwidth-constrained devices on cellular or LoRaWAN networks.
Checksums and integrity verification must happen before any flash write begins. Using cryptographic hashes like SHA-256, the device verifies that the downloaded image is complete and uncorrupted before touching the flash. Writing a corrupted image to flash is one of the most common causes of bricked devices, and it is 100% preventable.
Risk 4: Fleet-Wide Catastrophic Failures:
Deploy Staged Rollouts and Canary Groups:
This is where operational risk management comes in, and it is the practice that separates experienced embedded teams from beginners. Never, ever push a firmware update to your entire fleet simultaneously. I do not care how thoroughly you tested it in the lab.
A staged rollout means you release the update to a small percentage of devices first, monitor them closely, and only expand the rollout if everything looks healthy. A practical sequence looks like this.
First, your internal lab devices get the update. Then, a small beta group of opt-in users. Then, a canary slice of around 1 to 5 percent of your real fleet, spread across different hardware revisions, geographic regions, and connectivity types. You then watch the canary group for 24 to 48 hours, monitoring boot success rates, crash rates, connectivity stability, and any customer-reported issues. Only after the canary is healthy do you ramp up the rollout to 25%, then 50%, then 100%.
The key is having a clear “stop button” at every stage. If your monitoring picks up an abnormal crash rate or a spike in device check-in failures, you pause the rollout immediately and investigate before another device is touched.
I have personally seen canary deployments catch critical bugs that weeks of lab testing completely missed. One case involved a firmware update that worked perfectly on our dev kits but caused Wi-Fi stack crashes on a specific hardware revision in the field. The canary caught it at 3% rollout. Without staged deployment, it would have been a 100% fleet failure.
Monitor Your Fleet in Real Time:
Staged rollouts only work if you have real-time visibility into what is happening across your device fleet. You need telemetry. You need crash reports. You need heartbeat signals from every device telling you it is alive and healthy.
Modern OTA management platforms give you dashboards showing firmware version distribution across your fleet, update success and failure rates, device uptime, and crash logs. If error rates spike after an update, the platform should alert you instantly and allow you to abort the rollout with a single click.
Do not rely on user-reported issues as your primary alert system. By the time users start complaining, the damage is already done. Proactive monitoring is the difference between catching a bug affecting 500 devices and catching it after it affects 50,000.
Risk 5: Power Loss During Updates:
Design for Power Resilience:
Power loss during a firmware update is a scenario that engineers sometimes overlook during lab testing because lab power is reliable. But in the field, devices run on batteries, unreliable power grids, and solar panels. A device that loses power midway through writing new firmware to flash can end up in a corrupted, unrecoverable state.
The dual-bank architecture I described earlier already helps here, because the running firmware is never touched until the new image is fully written and verified. But you can add another layer of protection by implementing power-loss safe write sequences, where flash writes are structured so that a partial write can always be detected and recovered from on the next boot.
Some MCUs also support hardware-assisted atomic writes. If your MCU supports this feature, use it. It is cheap insurance against a very expensive failure mode.
Additionally, if you know your devices run on battery, consider scheduling OTA updates only when the device reports a battery level above a safe threshold, for example, 50%. An update that starts on a nearly-dead battery is a recipe for a bricked device.
Risk 6: Insecure Update Server Infrastructure:
Harden Your OTA Server:
Your firmware is only as secure as the server that distributes it. If an attacker compromises your update server, they can push malicious firmware to every device in your fleet. Even if your firmware is signed, a compromised server that also holds your signing keys is a complete disaster.
Best practices for OTA server security include storing private signing keys in Hardware Security Modules (HSMs) that are physically separate from the update server itself. Use role-based access control so that only authorized personnel can trigger firmware deployments. Enable comprehensive audit logging for every update action. And perform regular penetration testing on your updated infrastructure.
The signing keys should never exist as plain text on a general-purpose server. If the server is compromised, the attacker should get nothing useful. The HSM holds the keys, and the server only sends signing requests to the HSM. It never sees the raw private key.
Quick Summary:
Before you push your next OTA update, run through this checklist.
Make sure your firmware is cryptographically signed with ECDSA or equivalent. Verify that your delivery channel uses TLS 1.3 with mutual authentication. Confirm that anti-rollback counters are in place and stored in secure memory. Ensure your flash architecture supports atomic dual-bank updates. Test your watchdog timer and automatic rollback behavior. Run a canary deployment before any fleet-wide rollout. Verify that your monitoring and alerting systems are live and sending real-time data. Check that your update server signing keys are stored in an HSM. Confirm that your device will gracefully handle interrupted downloads. Make sure your update is blocked if the battery level is below a safe threshold.
If every item on that list is checked, you are in a dramatically safer position than the majority of teams pushing firmware updates today.
Conclusion:
Reducing risk in microcontroller OTA updates is not about doing one thing right. It is about building a system where every layer, security, reliability, deployment strategy, and monitoring, works together to protect your devices and your users. There is no silver bullet, but there is a proven set of practices that, when combined, make catastrophic failures extremely unlikely rather than inevitable.
From signing your firmware with ECDSA to staging your rollouts with canary groups, every strategy in this blog is something I have either implemented personally or learned from painful near-misses in real production environments. Take these seriously. Your devices are out there in the real world, and the engineers who respect that reality are the ones whose devices keep running.
Build it right from the start. Your future self and your users will thank you.
FAQs:
Q1: What is the biggest risk in microcontroller OTA updates?
A: The biggest risk is deploying an update without rollback protection, which can leave an entire device fleet permanently bricked.
Q2: What is firmware signing, and why is it important?
A: Firmware signing uses cryptographic keys to verify that an update comes from a trusted source and has not been tampered with in transit.
Q3: What does “bricking” a device mean in OTA updates?
A: Bricking means a device becomes completely non-functional after a failed update, often because the firmware was corrupted during the flashing process.
Q4: What is a staged rollout in OTA firmware updates?
A: A staged rollout is the practice of releasing an update to a small percentage of devices first, monitoring results, and gradually expanding to the full fleet.
Q5: What is dual-bank flash architecture?
A: It is a design where two firmware slots exist in flash memory, allowing a new firmware to be written to one slot while the device continues running safely from the other.
Q6: How can I protect my OTA update server from being hacked?
A: Store signing keys in a Hardware Security Module (HSM), use role-based access control, enable audit logs, and conduct regular penetration testing on your infrastructure.
